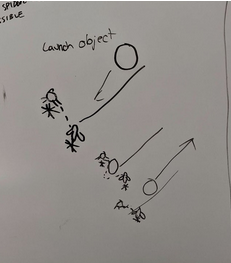
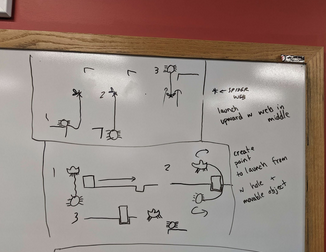
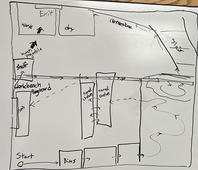
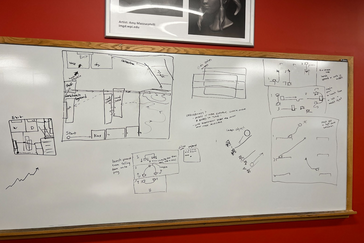
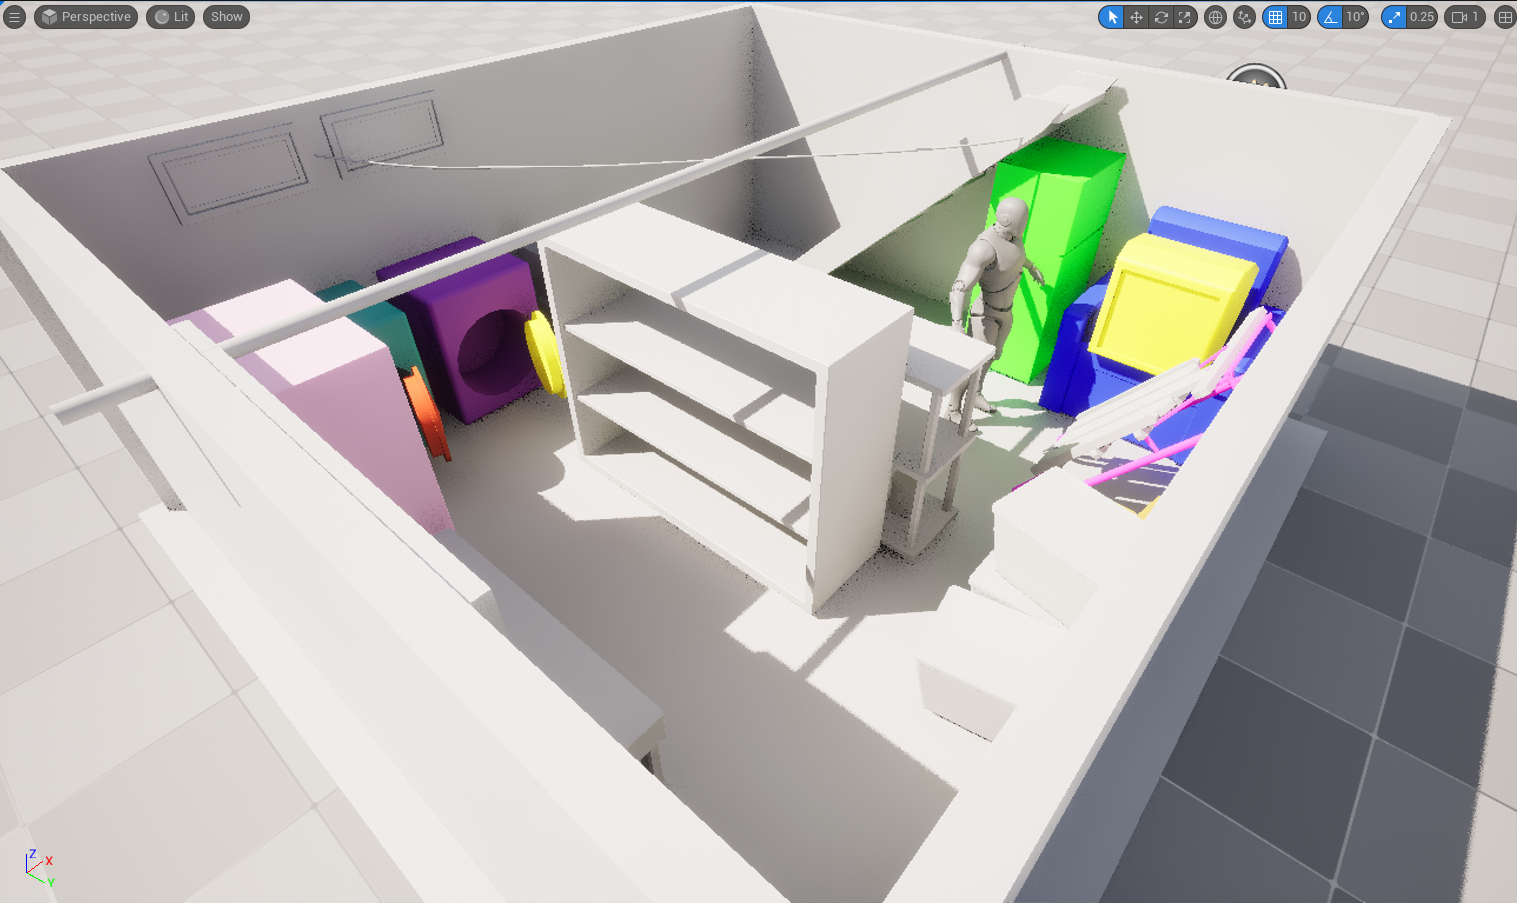
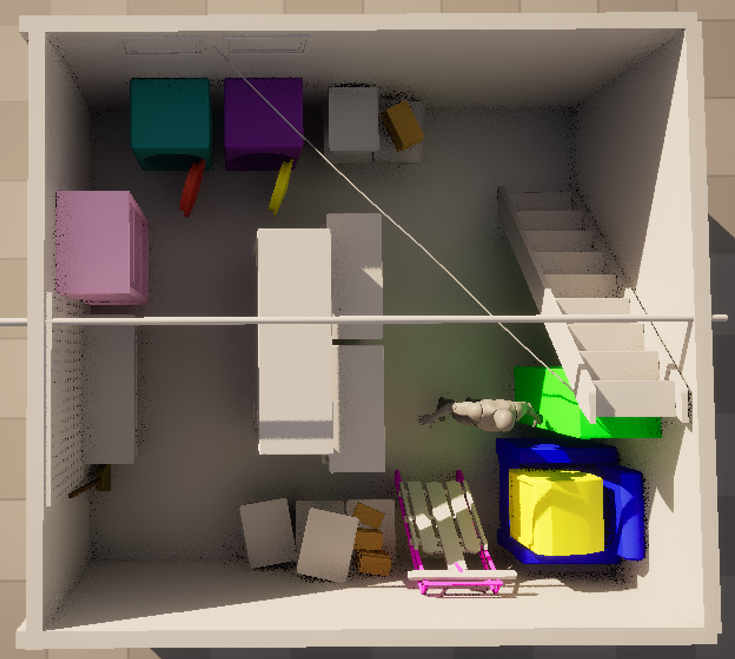
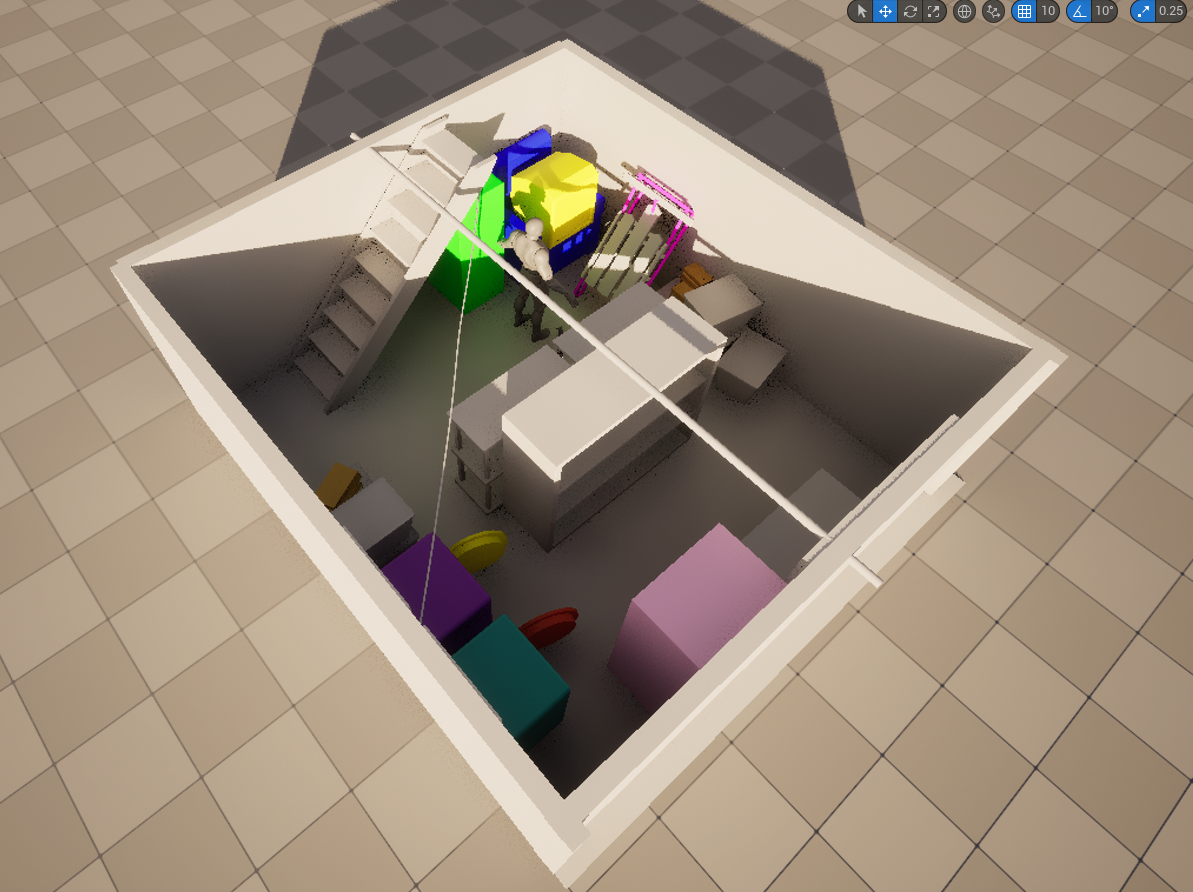
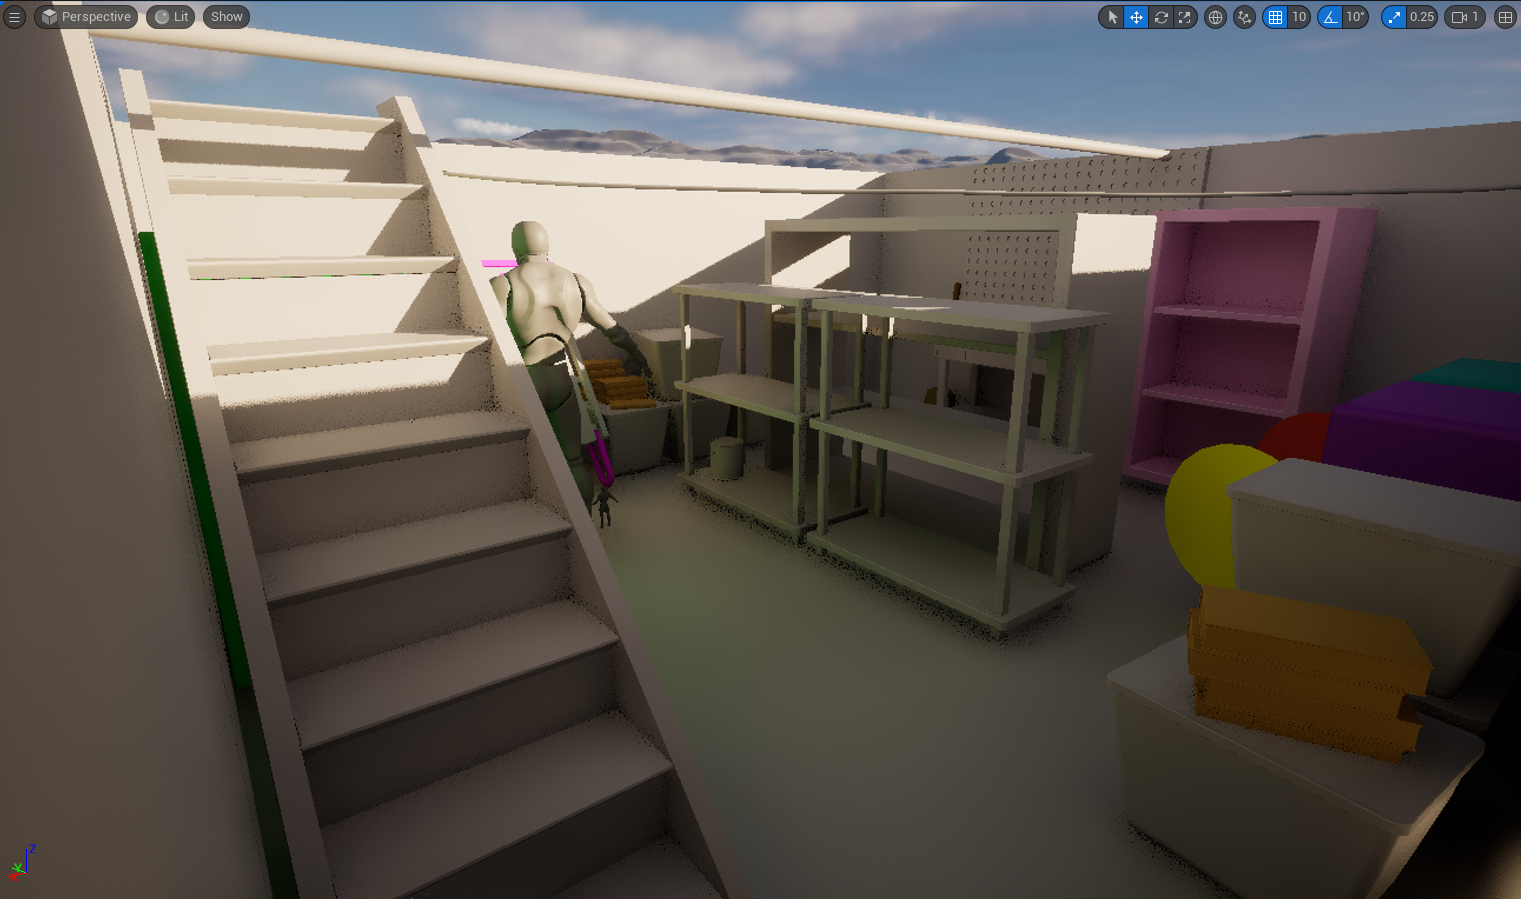
Above are our initial platforming challenge ideas involving the web swinging mechanics.
We used this as a basis to think of additional platforming challenges which we wanted to incorporate into our greybox design.
In this challenge, the two characters would sit in webs on either side of a falling object to launch it back the way it came.
In the top challenge, the players could launch the spider up vertically by jumping off a ledge with the moth in a spider web above it.
In the bottom challenge, the players could launch themselves horizontally by moving a block into a hole, preventing it from moving and allowing the players to use it as a fixed point to launch themselves from.
The team worked together to create a level design that would utilize the rope mechanic effectively, be fun for the player and utilize the theming of the level.
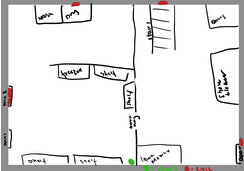
We started with a rough outline of a basement and then looked at it through the lens of the mechanics to create our finalized map. While the first map was focused on having a point A and point B
within the confines of a basement map, when designing the updated version the team had a focus on creating distinct regions to explore different mechanics. We also added more verticality to the
level design so the path feels more three dimensional. This version entices the player to explore the area to find the best possible route to escape while also requiring them to utilize the rope
swinging mechanic as much as possible.
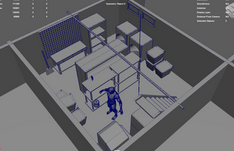
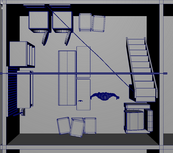
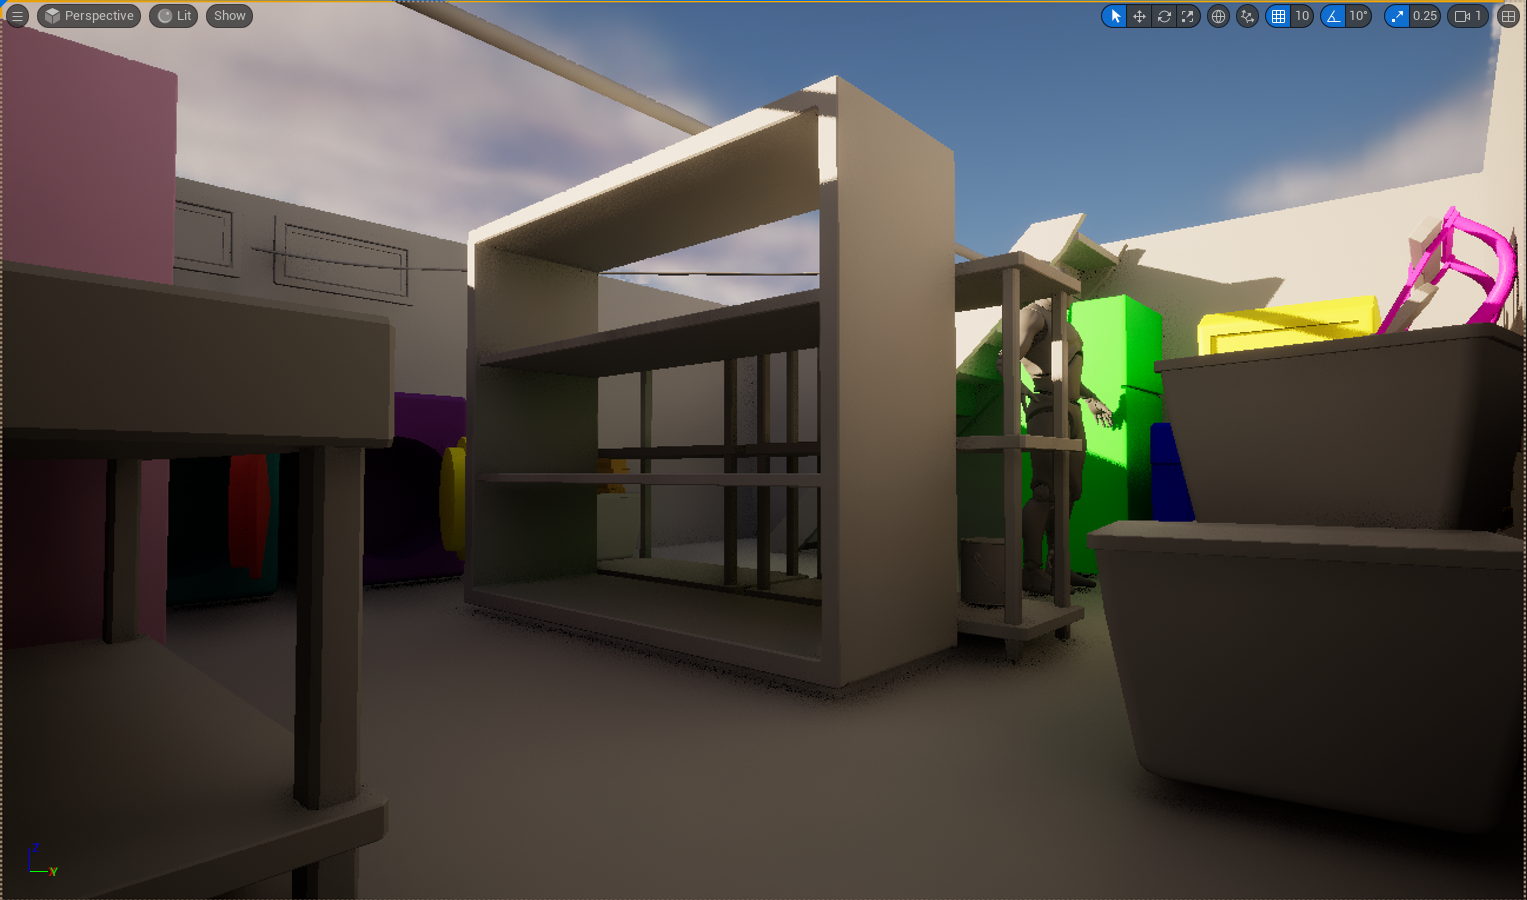
After the main layout of the map was finalized, the art team began the process of greyboxing. Starting with the base floor and wall shapes, we modeled all of the larger/most important set pieces of
the level, including larger bookshelves, benches, bins and windows. Each asset was modeled to be human size, yet not too massive for exploration on the player (bug) scale. After all main greybox
assets were modeled, each asset was unwrapped, given a basic material and brought into engine for staging. The screenshots below show some views from both Maya and Unreal (currently just maya).
We began creating smaller staging pieces like cans and jars to fill out the space. We also looked at assets from the Unreal store to save ourselves some time.
Lastly, we began creating the model for the player spider character.
When we started, Unreal version 5.3.2 wouldn't work on anyone's computers, neither lab nor personal. After a long debugging process with help from the professors, we were able to get version 5.3
running on our own computers, but it still wasn't fixed in lab. Because of this, we switched our project to version 5.2 so that we could work with minimal interruption. We also set up a Github
repository and established our own branches to work on our own sections.
This was a first blockout which allowed the tech team to share their visions with the art team, which facilitated an easier combined idea. By creating a basic blockout in Unreal, it was easy to
communicate both the scale and the general level design we were going for. This was an important asset to include in the final level map. The test level proved to be helpful for troubleshooting
our engine issues, as the art team was first unable to open the blockout on the lab machines.
One of our main investigations this week was into UE5 ropes. After making a very basic test character controller, we investigated the CableComponent class built into Unreal. The CableComponent
deals with rope rendering and can connect two points automatically. It also has collisions, but they aren't by default quite as robust as we may like them to be. The issue with CableComponent is
that it lacks true rope physics. Though the cable does sag down with gravity, if the endpoints of the rope move, the rope simply lengthens or retracts to match.
We've planned several ideas to potentially address this. Some users recommend skeletal meshes rather
than CableComponents, which we will begin to investigate this weekend. Alternatively, we do actually want the rope to stretch a bit in our game, so the CableComponent may end up working out of the
box for our purposes. We would simply need to detect how far it has stretched and apply visual cues and forces as necessary. The plausibility of this approach will depend on how easily accessible
the internal variables of the CableComponent are within C++ and Blueprints code as well as the modifiability of the CableComponent class. This area of investigation will be one of the tech team's
top priorities going into next week.
We created rope physics using a straight skeletal mesh. This works much better than Unreal's default cable component and maintains a close to fixed length. It can also wrap and become different shapes in a much more intuitive way. It isn't perfect; it still clips through other colliders very easily, but it's a major improvement from the cable component.
The rope uses physics constraints to connect to the players. Adjusting the linear limits of the bones allows us to lengthen the rope from its default length. The angular limits and angular motor make sure the segments act like a rope would. Here is an image of the rope's skeleton tree.
The first step to the rope launching mechanic is determining when it should happen; to do that, we need to traverse the skeleton tree. By traversing the skeleton tree, we can find the location of each bone, add the distances between each consecutive bone, and the sum of those distances will be the total length of the rope. Even though the constraints of the bones are mostly rigid, the total length does increase by about 10 or 20 units when the rope is stretched, which makes reliable detection for when the launch trigger should occur.
Once we detected when a launch should occur, the next step was to apply it. We had two approaches to this. The first approach involved applying a force to the rope at each of its end segments in the direction that the end segments were facing. This approach led to some unintuitive results, often causing the rope to go in strange directions.
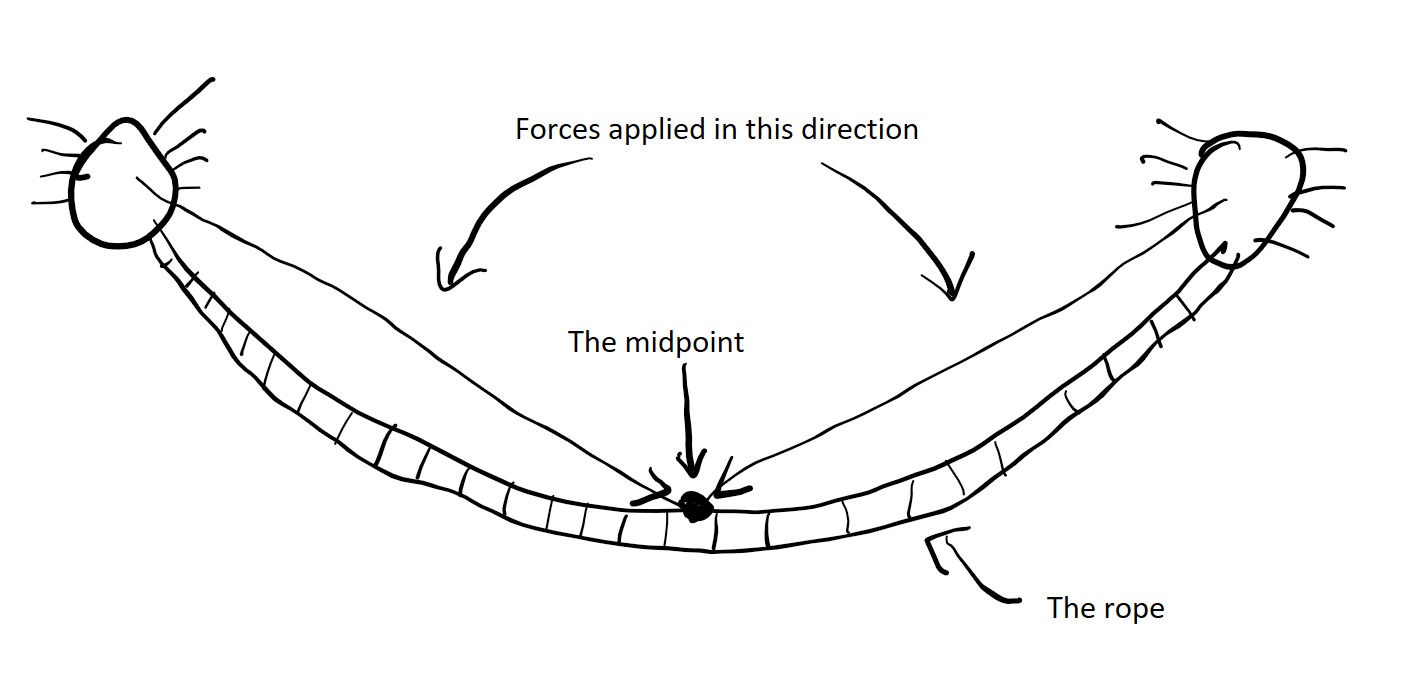
Instead, we applied a force in the direction of the line from each end of the rope to the rope's middle point. This force was also applied to the objects the rope was attached to rather than the rope itself. This approach led to much more intuitive results.
The next step for rope launching will be to give players a “Warning System” that lets them know when a launch is about to occur. This will be done with sound and visual cues, but we also want to stretch the rope into three discrete length stages. This may be difficult because Unreal doesn't give us direct access to the bones of a skeletal mesh, but it will be a top priority going into the weekend.
Unreal has a built-in Character Movement component that you can attach to an Actor and it
handles all the movement code for you. However, this movement system did not work with our
rope implementation. To start with the new character controller, we created a new Pawn
blueprint and added a Capsule component.
Each tick, we get the player's movement input and add a force to the Capsule equal to
the movement input multiplied by a speed scalar. After, if the velocity of the Capsule
has a magnitude above a Max Speed value, we normalize the velocity vector to just get
the direction, then multiply that by the Max Speed to get the capped velocity. A flaw
with capping the speed is that additional forces will be overridden. To fix this,
additional forces can be applied every frame after the movement capping has been done.
Since we want to have the camera move around in the scene, we also need to change the
direction of the player's movement to be based on the camera direction. We first grab
the currently active camera from the Camera Controller, then we get the Forward and Right
vectors of the camera. The plan is to multiply the Vertical Movement input by the Forward
vector and the Horizontal Movement input by the Right vector, but first we have to make
some changes to the Forward and Right vectors. The camera may be angled downward, so the
Forward and Right vectors will have a vertical component, so we first have to strip the
Z component from the vectors and normalize the two vectors so they still each have a
magnitude of 1. Now we can multiply the movement input by these vectors to get our
remapped values that will be used instead of the raw movement input. Our new movement system
now works with the rope.
For the moth character, we need to implement flying. We took some inspiration from Flappy
Bird and want the flying to be done through a continuous jump. We first create a new BP
for the moth character that inherits from the other character class. When a jump input is
received, we add a vertical force to the Capsule. We don't want the player to be able
to jump infinitely so we need to add a delay. We use a Do Once node before adding the
force to the player, after this node has been executed once, it can't be executed again
until it has been reset. After adding the force to the player, we start a timer, and when
that timer ends it will execute an event that will reset the Do Once node.
We now have basic implementations for the characters. Now we have to get the multiplayer
set up to have two characters being controlled by different controllers at once. We also
need to have the characters rotate to face the direction they are moving. Once the
character models are imported into the game, we will also need to set up animations.
To start we made the Camera Manager and Camera Node actors. The Camera Node houses the
position in game a priority integer to differentiate priority to the manager. The manager
houses an array of camera nodes, a local variable for the “currentWinnerNode” which
represents the best node where the camera should be placed, a reference to the main camera,
and a reference to the player.
After placing the nodes into the scene and adding them to the array of nodes in the
manager we have the manager loop through existing nodes and for each node it shoots a
raycast from the node to the player. If the ray doesn't hit the player the loop moves
on ignoring that node as a possible camera position. If the node hits the player it
checks if the currentWinner is null. If it's null it sets itself as the currentWinner.
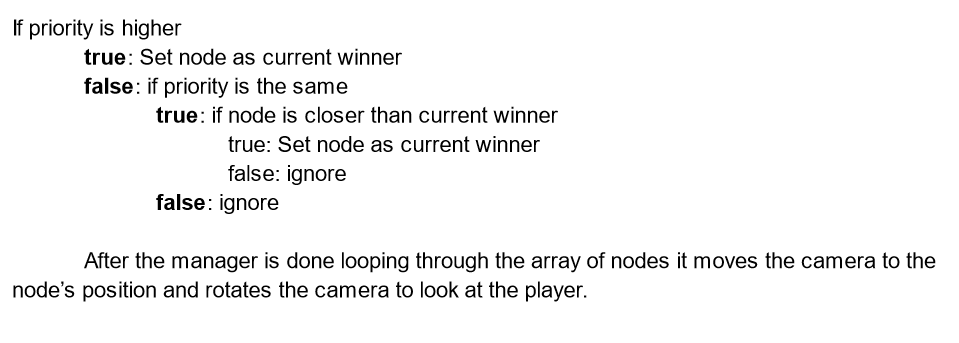
If it's not null it goes through the process of checking if it's a better position.
The process runs like this:
The spider player's web shooting mechanic is still very early in development (it was started on Thursday).
The webs themselves don't actually do anything yet, but have collision set up for when that's going to
be implemented with the player characters (and possibly other objects). This is just in the form of
some unfinished blueprint functions.
Currently, all that has been implemented is a forward “launch” of the web, which sticks
to whatever object it hits within a distance limit. There is an arrow attached to the
player which determines part of the direction to shoot from. The webs themselves don't
do anything to the players yet, but they have a “slowdown” variable that we've decided
will probably be used to impact the velocity of the player, on top of them just being
prevented from moving. Exiting the webs will likely be done by spamming the jump button,
but we haven't finalized anything.
We implemented the first pass of objects into Unreal from our Greybox design. All of
these objects were unwrapped prior, and included the structure of the basement, all
major set pieces, and some clutter items. We began to model more pieces for the room,
including a starting location for the player, clutter items, and items that will be
interactive with the character. The player will be able to use the rope mechanics to
manipulate them to influence game play. We also created the high poly mesh for the
spider player character and then began to work on the high poly mesh of the moth
player character.
The launch warning system works! There are now three stages of the launch. Each is marked by a different rope length threshold. Once the threshold is reached, the linear limits of the rope are increased to a new value and the color of the rope changes. When the third stage is reached, the rope applies the force to the characters as we've seen before.
I have started working on sounds and music, but not much has been produced due to more pressing issues.
An issue arose with the camera controller where the camera wasn't rotating to look at the player nor was it updating to a closer camera. The problem was that the Actor that was the target of the algorithm didn't move while the character capsule component was moving. The solution was making the capsule component the root of the base character and then getting the World Position of the root of the Target Actor.
The process of working on web-related features this week has been slower than ideal, but that was caused by multiple different unrelated bugs that had to get resolved in-series
(one with the camera system, one with input), which weren't fixed until Wednesday. However, making changes afterward was fast, and now we have fully-functional webs and a partially-functional
way to shoot them.
Earlier in the week, when we were unable to test movement in our web branch, we opted to work on the aiming system instead. Last week's blog showed that the spider could shoot webs directly
in front of it, but not much else. Now, the spider is able to click and hold the left-mouse button to display a simple line trace where the mouse is in order to aim, and then release the button
to fire a web at the collision location of the trace… with some caveats.
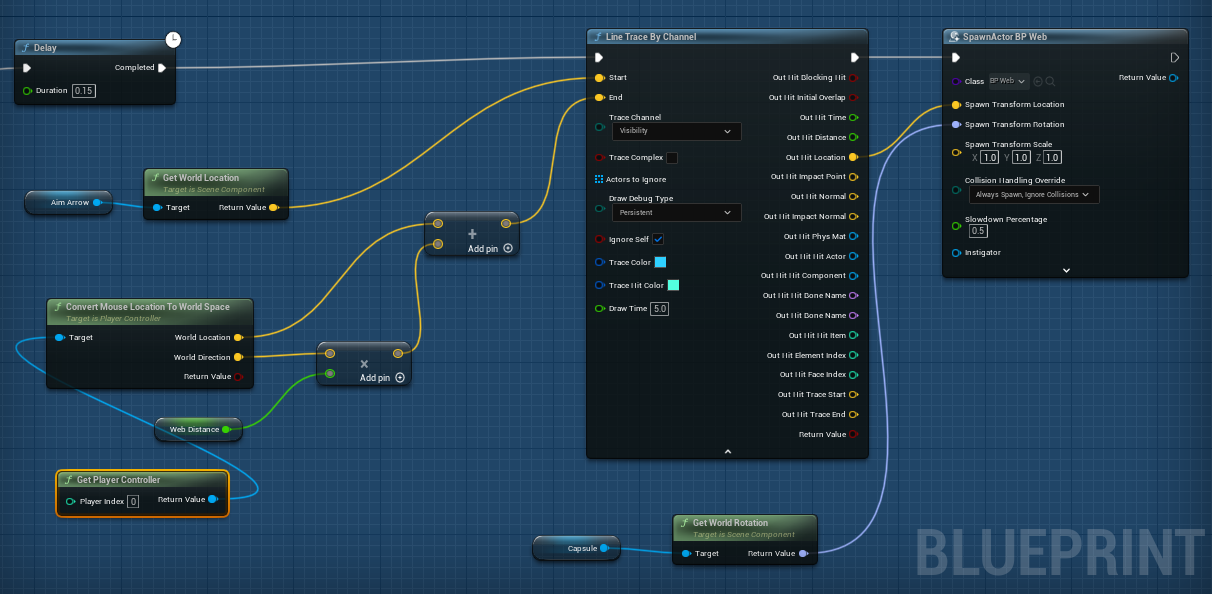
This is done by having the beginning of the trace be located at the spider's “aim arrow”, which is just an arrow that sits slightly in front of the body; this is the same as last week.
The end of the trace is the more interesting part; it is located at the world location of the mouse's location, calculated by a built-in function called “Convert Mouse Location to World Space”.
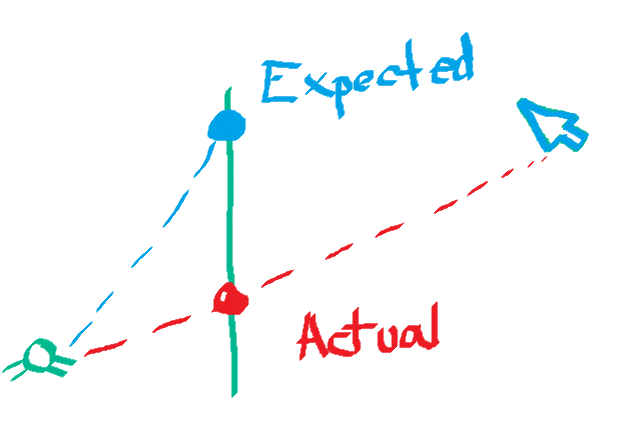
This works very well, especially if your camera is facing the same way the spider's arrow does. However, this isn't usually the case, and since the function almost works too well, it doesn't
“cut off” the world position calculation at visible objects. This leads to a “disconnect” between the visible mouse and the cast, which makes it impossible to aim if the camera is near top-down.
We would like to update the aiming, but for this week it was more important that the webs were properly implemented. When a player collides with a web, it uses a physics constraint to stop the
player from moving until the player, on their end, jumps and calls a web function to request to be removed from the web, which updates and disables the constraint. Webs work the same way when
shot or placed manually, so we'll be able to build our alpha level design with or without optimal shooting.
At this stage of development it was important to get both characters working at once to test the gameplay.
We were faced with difficulty when getting multiple controllers working at once so we decided to first
get both characters working while being controlled by a single controller. We created new input
actions for the second character to use and created a new Pawn actor to serve as a hub that both
characters would listen to.
The characters get the movement input from the hub each tick, but for the jump, shoot, and any other
actions that are triggered when a button is pressed, we didn't want to check every frame. For these
actions, we created Event Dispatchers that will be called when the corresponding Input Actions
have been triggered. The characters bind an event to an event dispatcher on BeginPlay, and then whenever
that event dispatched is called, that event will execute.
To add the character models to the characters, we added a Skeletal Mesh component as a child of the
Capsule collider in BaseCharacter. For each character, we selected that character's mesh and scale it
to a desirable size. We also had to rotate the character to face the forward direction of the character.
The Skeletal Mesh component will also allow us to animate the character later down the line.
Now that we have character models, we need to make sure that the characters rotate in the direction they are moving.
First, we need to find out the angle that we want the player to be rotated. We are using the Find Look
at Rotation method to do this: we use the character's location as the start position, and then add the
direction of the character's velocity to the start position to get the target position. We had to make two
adjustments to this output. For one, we only want the character to look side to side, so we split the
Rotator and just use the Yaw rotation. The second adjustment we need to make is to subtract 90 degrees
from the Yaw output (this might not be necessary in every situation but it was in ours).
If we use the Set Relative Rotation method, this mostly works, though it's very snappy since it doesn't
gradually rotate and also has an issue where the rotation would change to a different value to when
it goes past 180 instead of continuing in the direction it was going and the character would spin fully
around.
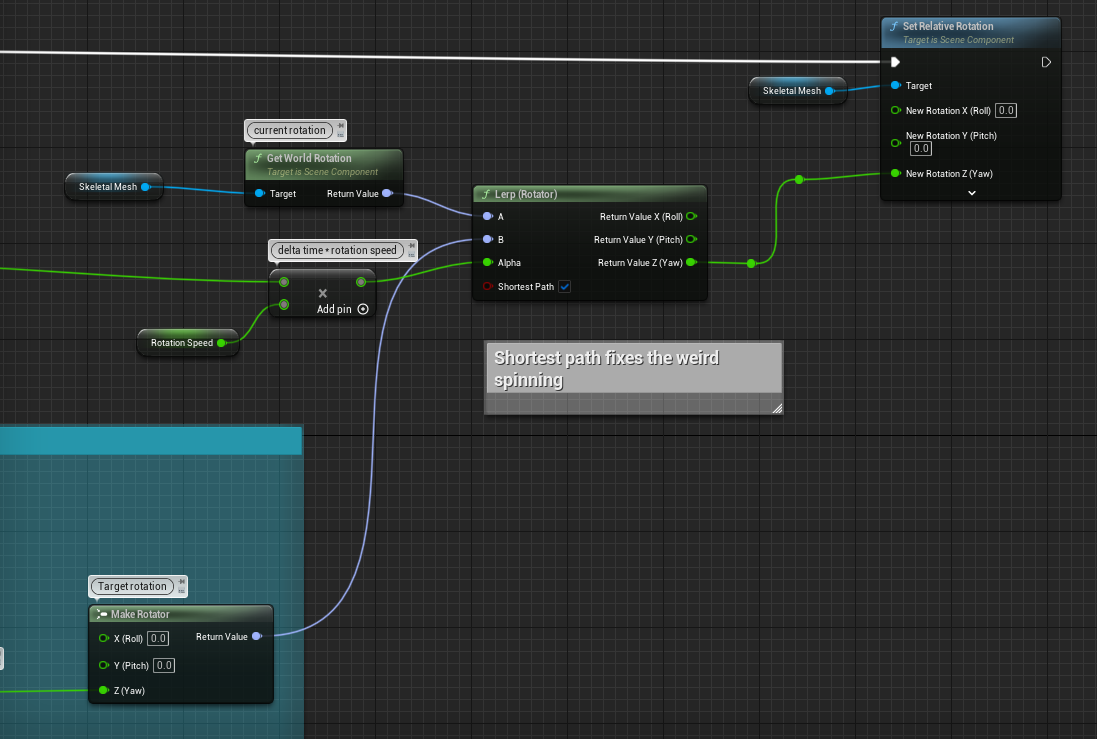
The amazing and wonderful solution that freed us of both of these problems is the Lerp method. We used
the Lerp method with the A input being the current rotation of the skeletal mesh, the B input being
the target rotation we found earlier, and the Alpha value being delta time multiplied by a rotation
speed scalar. Ticking the 'Shortest Path' boolean fixed the weird spinning.
Now when we set the rotation, the character model rotates in the direction of movement.
Since we're only rotating the model, we have to make sure that any Arrows that we use for abilities like the one for the spider's web shooting should be a child of the Skeletal Mesh.
Now Giovanni can jump! When initially designing the character controllers, we weren't sure if we were going to give the spider that much mobility. After implementing the characters and rope
enough to test reasonable movement in the greybox, we decided that in order to give the spider more movement agency, they needed to be able to jump.
There were two major problems with our alpha's export. The first is that the moth can barely jump in the exported version, and the second is that the rope is much more difficult to launch.
We suspect both bugs could be caused by a framerate discrepancy, but for a long time our attempts at changing the tick events and going through debug steps were all unsuccessful. Our best
guess for what's causing the rope bug is as follows: the rope is technically not supposed to stretch. The physics constraints should prevent that, and for some reason, they're better at
preventing that in the export than in the editor. Therefore we needed to do one of three things:
On Saturday, we managed to fix the moth jumping issue by using an impulse rather than a force, which helped solve a framerate discrepancy for the physics ticks. The rope unfortunately couldn't
be fixed quite so easily, because physics constraints are naturally met better on faster machines. Doing async physics did make the behavior consistent, but unfortunately the consistent
version did such a bad job at satisfying the physics constraints that it made the rope utterly unusable. Instead, we opted to change the rope so that the threshold it needs to reach is under
its maximum physics constraint values. That means it's much easier to stretch the rope, but it makes the discrepancy go away and isn't too bad on the mechanics side.
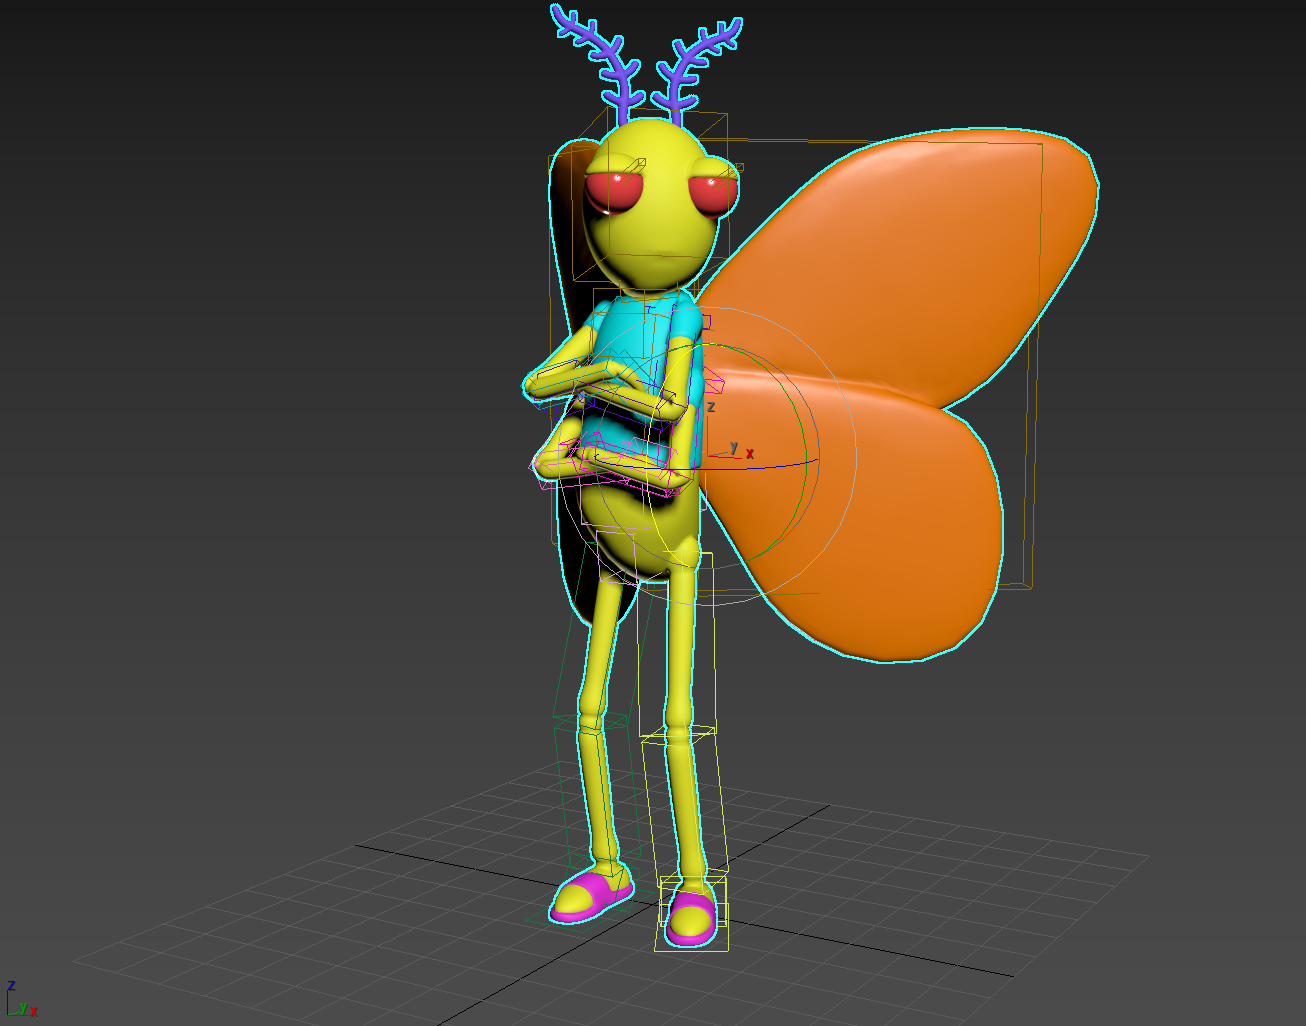
We optimized the high poly models of the player characters and unwrapped them. A base color texture was applied. The models were then brought into 3DS Max to create a CAT rig for both of them.
These were exported to begin animations over the weekend.
We began to texture the larger set pieces of the basement. This included things like the walls, shelves, and refrigerator. More textures will be created in the future, as we are not focused on
implementing textures for the alpha.
The tech team created character controllers that were at a larger scale than the objects we had modeled. We had to scale the high poly models of the characters to the size of the controllers, and then scale the environment around them. After this, we added exterior lighting to the level and smaller point lights inside the level. We also added a glass texture to the windows.
When beginning to test exporting our project, we realized that our current method of viewing Giovani's web shooting trajectory was debug-only. We were using visible line traces, which don't show up in exported builds.
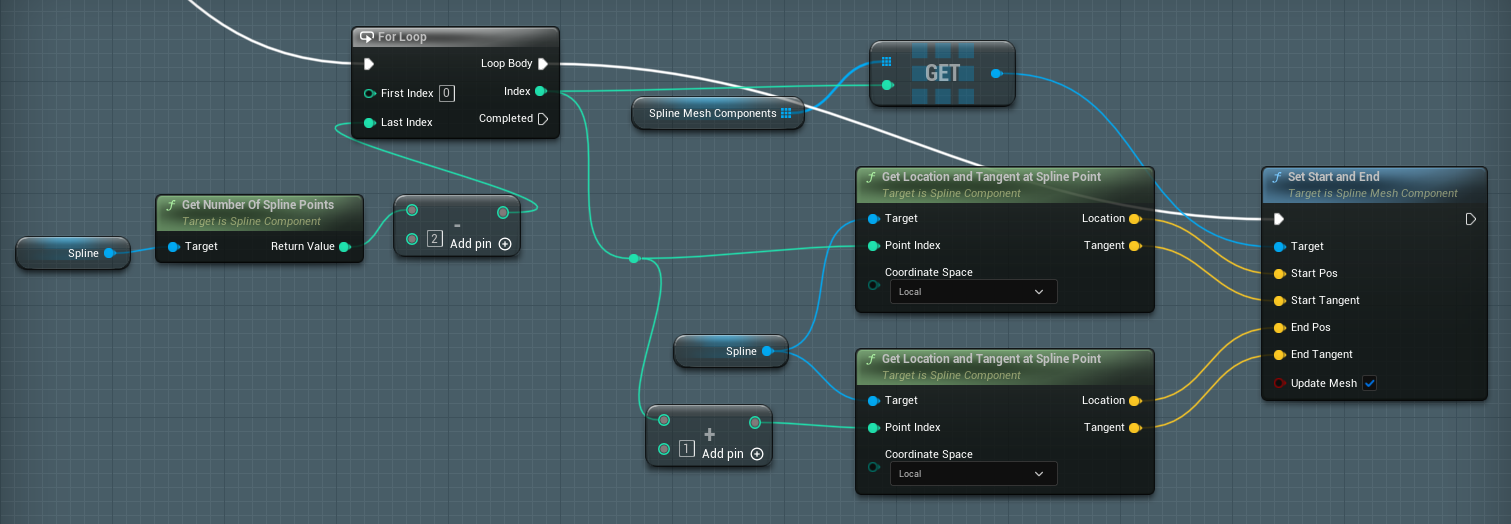
For the alpha build of the game, we found it necessary for the player to be able to see where they were shooting, since the aiming functionality is still wonky, and dependent on the camera angle relative to the players (we do, however, have an idea on how to improve it, which we will implement next week). When investigating options for a visible aiming trajectory, we learned that Unreal has no built-in functions for easily drawing lines in 3D space (except for debug line traces). Instead, we decided to use a spline which is “connected” to the player and the hit location of the original line trace.
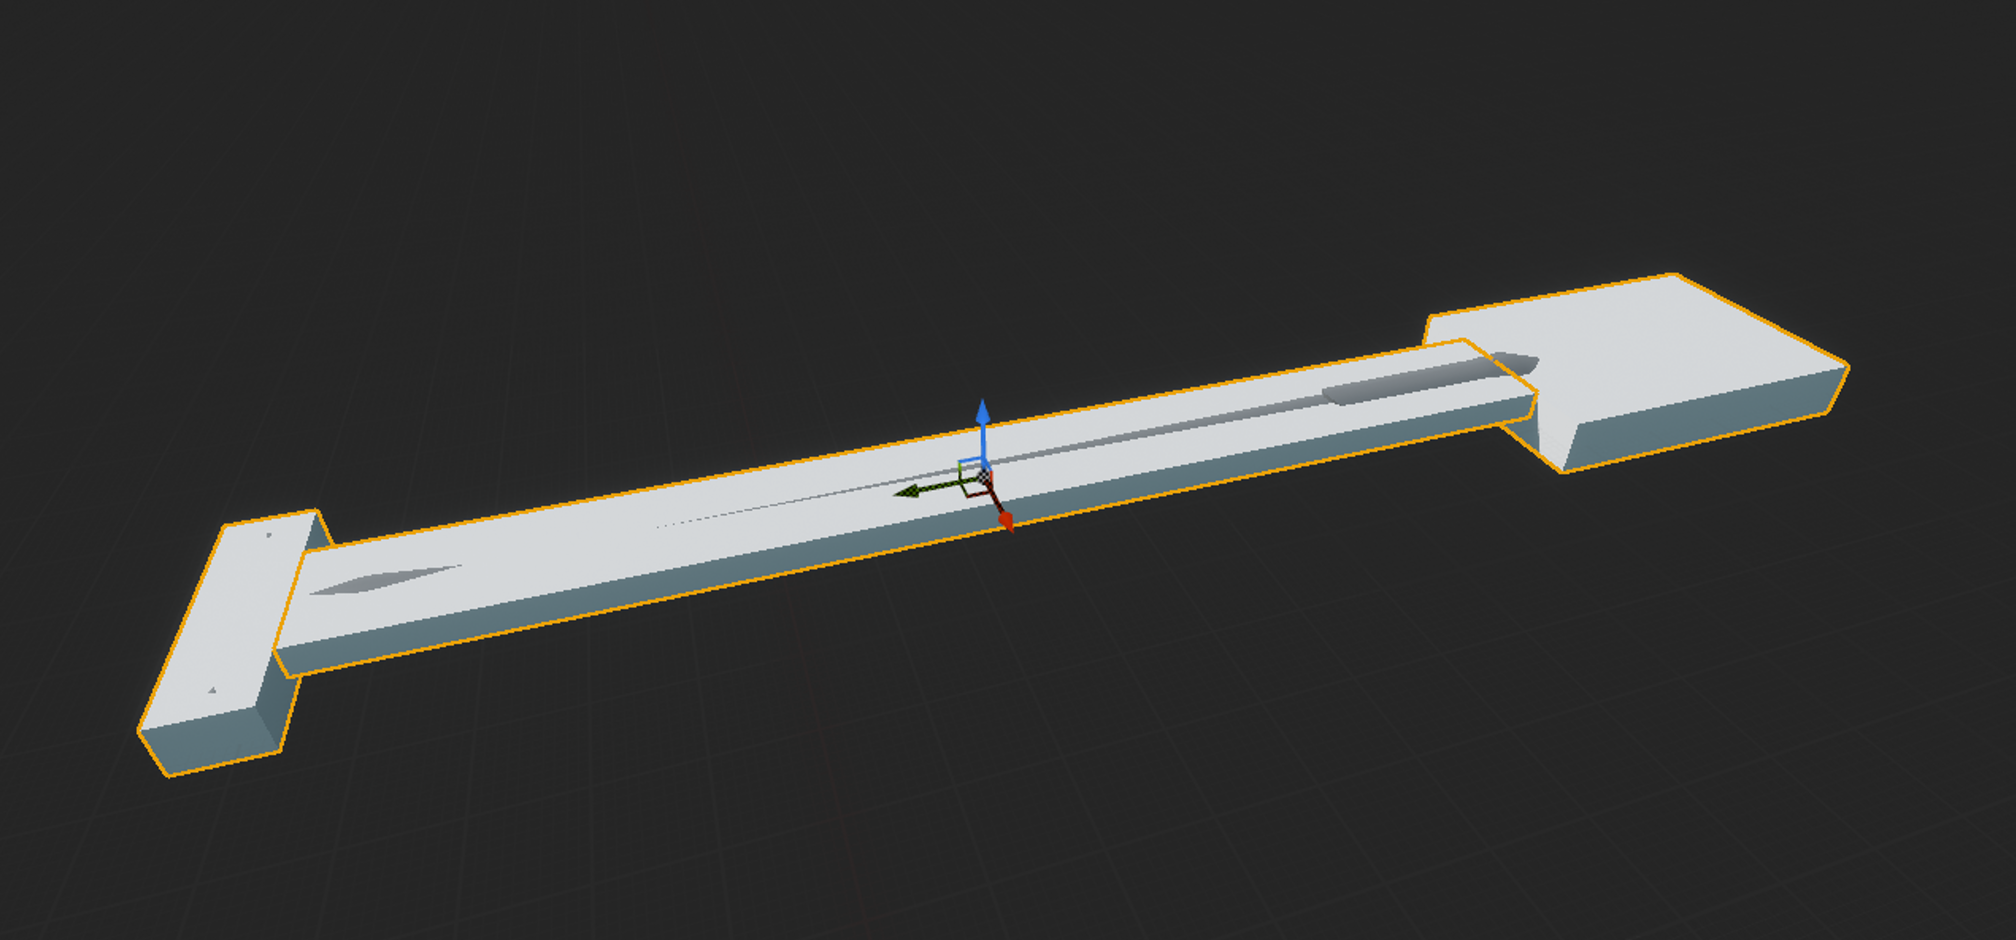
The spline isn't just a default Unreal spline object, but an actor that contains a spline so that it can handle its own movement and meshes. Splines are only visible if they have a mesh attached to them, which was the hardest part of the implementation; We needed a mesh that would look good when stretched, since it is unnecessarily complex to update the amount of spline points (and, more importantly, spline meshes) every tick. We opted with using a basic cylinder as the mesh, and adding a “laser pointer” material to avoid the problem of the material's stretch impacting the visuals.
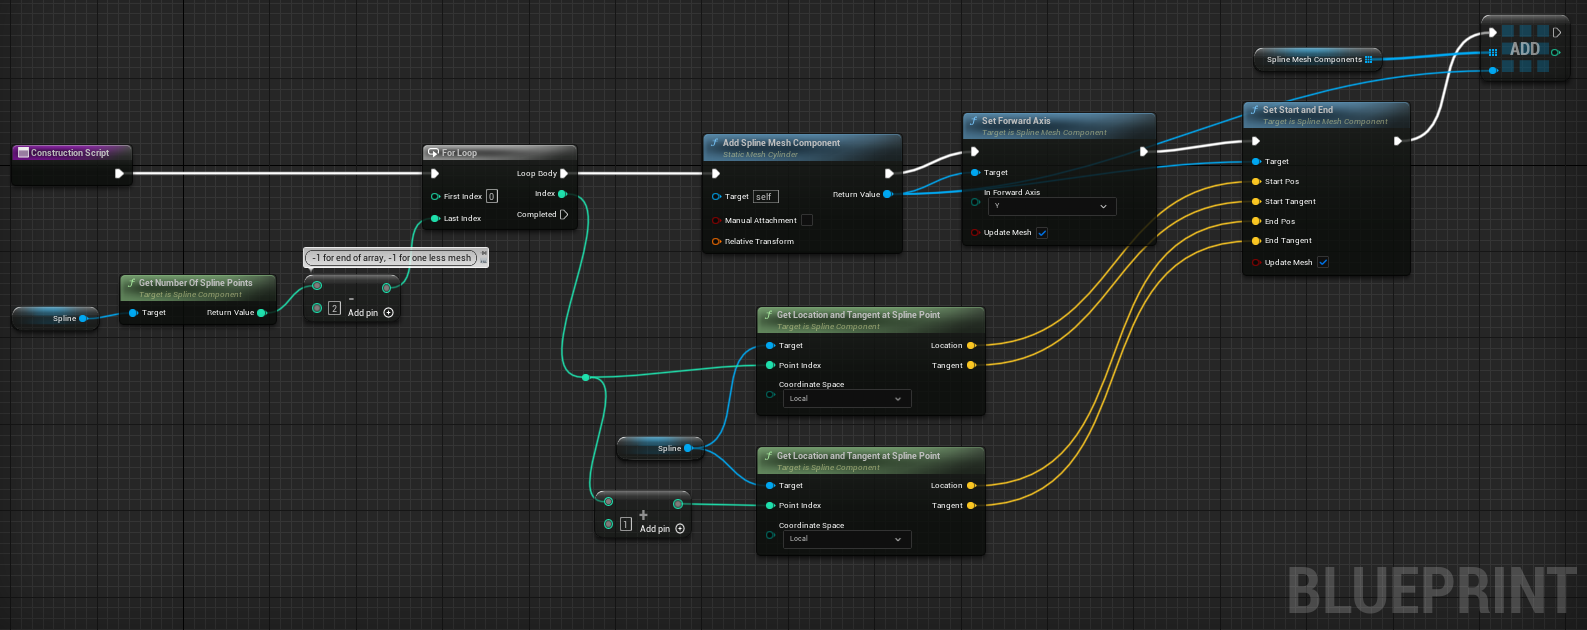
If we have time in the future, we may decide to make the trajectory an arc by adding a point which will always remain at the midpoint of the other two, while raised up above them (from a 2D perspective). We also plan on changing the spline's material; we like the laser pointer, but if we decide to keep it, we will tone it down a bit (decrease the brightness and/or the amount of light it puts out). We may also change it to be a dotted line, ditching the laser pointer material entirely.
We also decided to make a slight modification to the spider webs to make their condition more obvious to the player. Now, when there is a player stuck in a web, the web changes color from white to green.
In the alpha build, when determining where to shoot the webs, a line is drawn between the spider player and the 3D cursor. The problem is that the 3D cursor is very far away in the 3D space, and as a result of this the line is intercepted by the wall at a much lower elevation than we are intending.
The spider is unable to shoot the web to many of the intended locations because it cannot aim very high upwards.
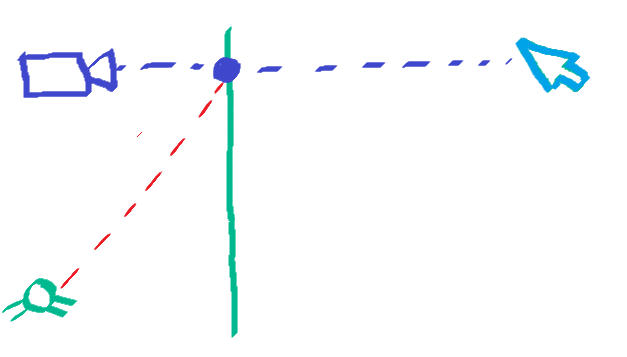
The solution we discovered was first to draw a line trace between the camera and the 3D cursor and get the point where the line hits a wall. We then draw a line trace from the spider character to the intersection point of the previous line trace. By doing this there is less distance between the spider and the target position so it is able to reach the full intended elevation.
We ran into an issue where the line trace was barely not long enough to reach the wall due to minor losses in accuracy. To fix this we just had to make the line trace go a bit further than the target destination.
With the new system in place the web aiming is finally able to reach the proper intended height!
Another addition we made was to have the GFX of the aim line be dotted.
The way we did this was by creating a new Material, setting its Blend Mode to mask, then plugging in a Black & White striped texture to the Opacity Mask node.
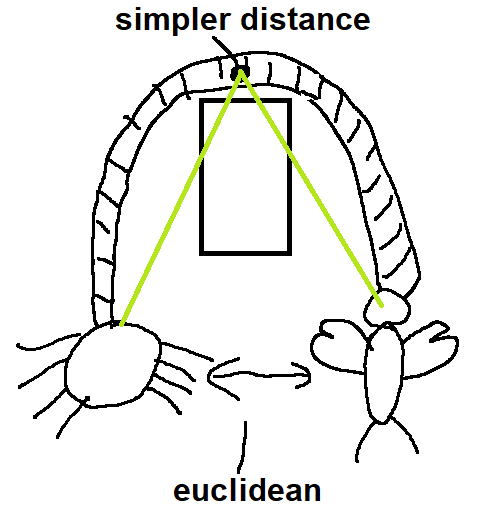
At the end of last week, we had two main export issues. First, the rope wasn't reaching the length threshold needed to launch on higher-end machines. On lower-end machines, it would reach the length threshold too easily! This is likely due to different physics framerates. Technically, any deviation from the rope's length is a slight violation of the physics constraints, so the better a machine is, the shorter the rope will remain, and vice versa. We at first fixed this on higher-end machines by setting the rope length thresholds lower, but that made the problems on lower-end machines worse. In the end, we fixed the problem by throwing out the rope length calculation entirely, instead simply using the distance between the two characters. We expected this would lead to some unintuitive results; therefore, we at first planned to only enable this setting on lower-end machines. But we found that the result was pretty much indistinguishable!
The only time the new system would make a difference is a situation like below.
But in this case, the simpler solution would be to use just one bone in the middle to mitigate the inconsistent effects of the constraints.
This is a lesson in not over-engineering problems. If you come up with a dead-stupid solution that might just work well enough, go for it! You can always make the more complicated one later.
On lower-end machines (specifically Milo's laptop with integrated graphics), the rope had another issue: it kinda freaked out when characters got far enough apart, launching characters with incredible force and then breaking. We mitigated some of this by removing the linear motor on the rope, but it still wasn't perfect. Here's how it works now:
The rope will often go far beyond what its constraints allow, which leads to weird behavior. There's also much more clipping, not just of the rope but of all physics objects. For now, we've done all we can to mitigate these issues, so we mostly just recommend playing the game on a computer with a dedicated GPU.
Fixing the moth jumping was done by using impulses rather than forces. This was likely also due to the different physics frame rates on different machines. Since a physics tick is much shorter on a higher-end computer, it wouldn't jump nearly as high. We instead used an impulse, which isn't dependent on tick length.
This week the camera system needed a few tweaks to confirm it was working correctly. Different checks were needed to be made on the algorithm to correctly choose a camera. After camera nodes were placed around the level, The camera broke for a short period where it stopped looking at the mid-point of the players. After that was fixed the camera was ready for the Alpha.
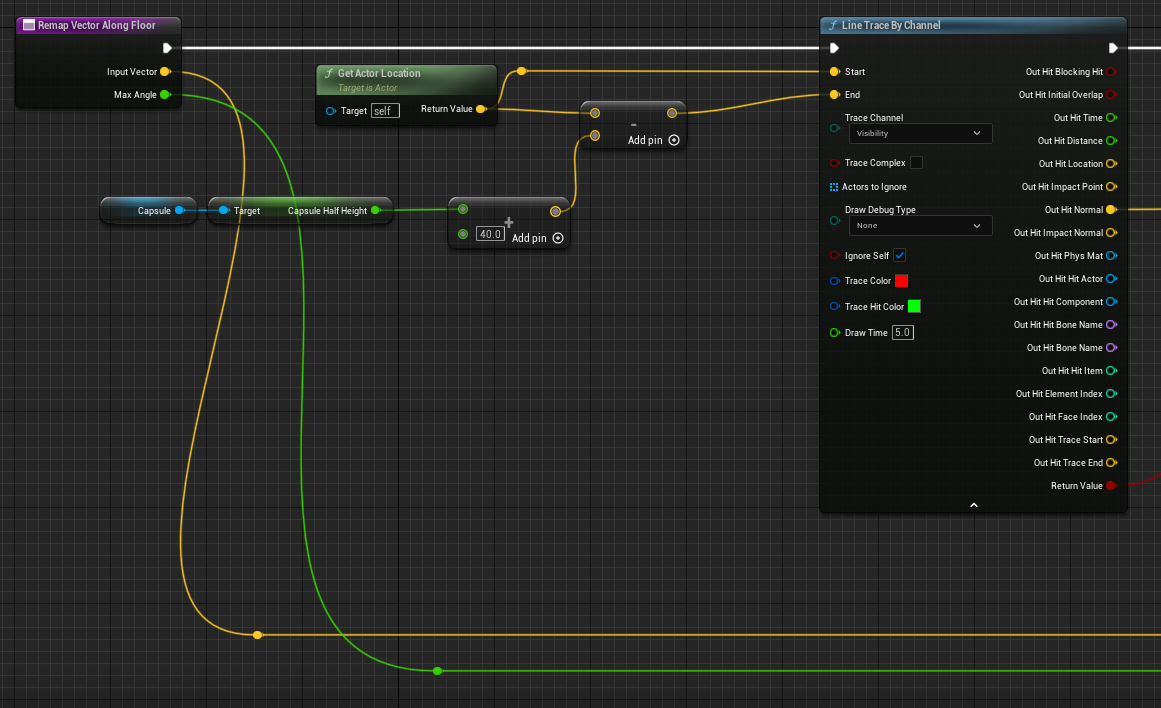
The character controllers in the alpha build struggled to go up sloped surfaces.This was because even when standing on an angled surface, their movement direction is fully horizontal, and they need some of their speed to be vertical to successfully climb the slope.
We need to align the speed of the character's movement to the angle of the slope. The first step to accomplishing this is to find the Normal of the surface. We can get this by sending a Line Trace downward. The Out Hit Normal vector output is exactly what we want.
We want to be able to limit which surfaces the characters can align to. If the angle is above a certain threshold we don't want to remap the movement direction. To find the angle of the surface, we get the Dot Product of the Up Vector (X=0, Y=0, Z=1) and the Normal Vector we got earlier, and then we put that through the Acosine (Degree) function.
With that, we can decide whether or not to remap the movement vector based off of the angle of the surface.
With the Normal Vector known, we can remap the movement direction using the Project Vector Onto Plane function. We use Out Input Vector as V and the Out Hit Normal vector from the line trace as the Plane Normal. The projection function messes with the length of the vector, so we also normalize the result and multiply by the length of the Input Vector.
Hooking that function into the player controller, it can now successfully go up slopes!
A mistake we made with the previous version of the Character Rotation and blog post is that we used Set Relative Rotation instead of Set World Rotation. While the feature was in development, Set World Rotation was misbehaving while Set Relative Rotation was working properly. However, the Shortest Path feature of the Rotation Lerp function fixed the issues caused by this function. The Set Relative Rotation function gave us problems with the rope and we have since changed to use Set World Rotation.
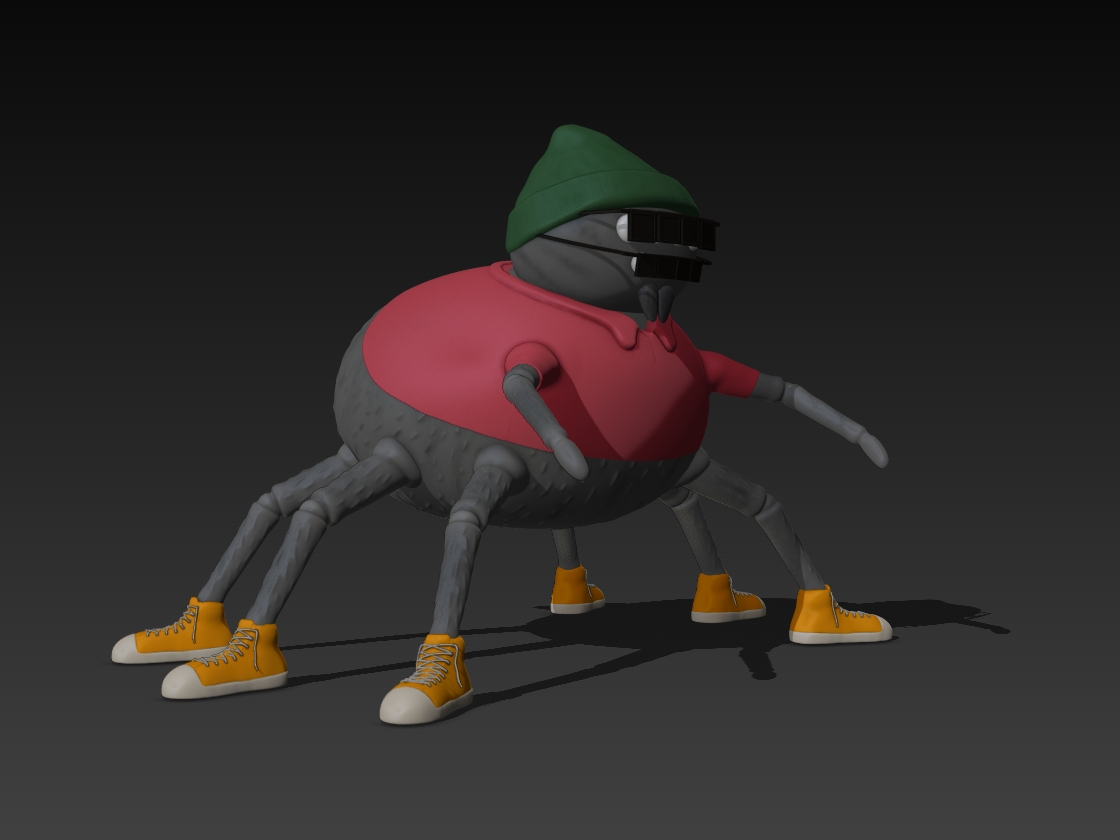
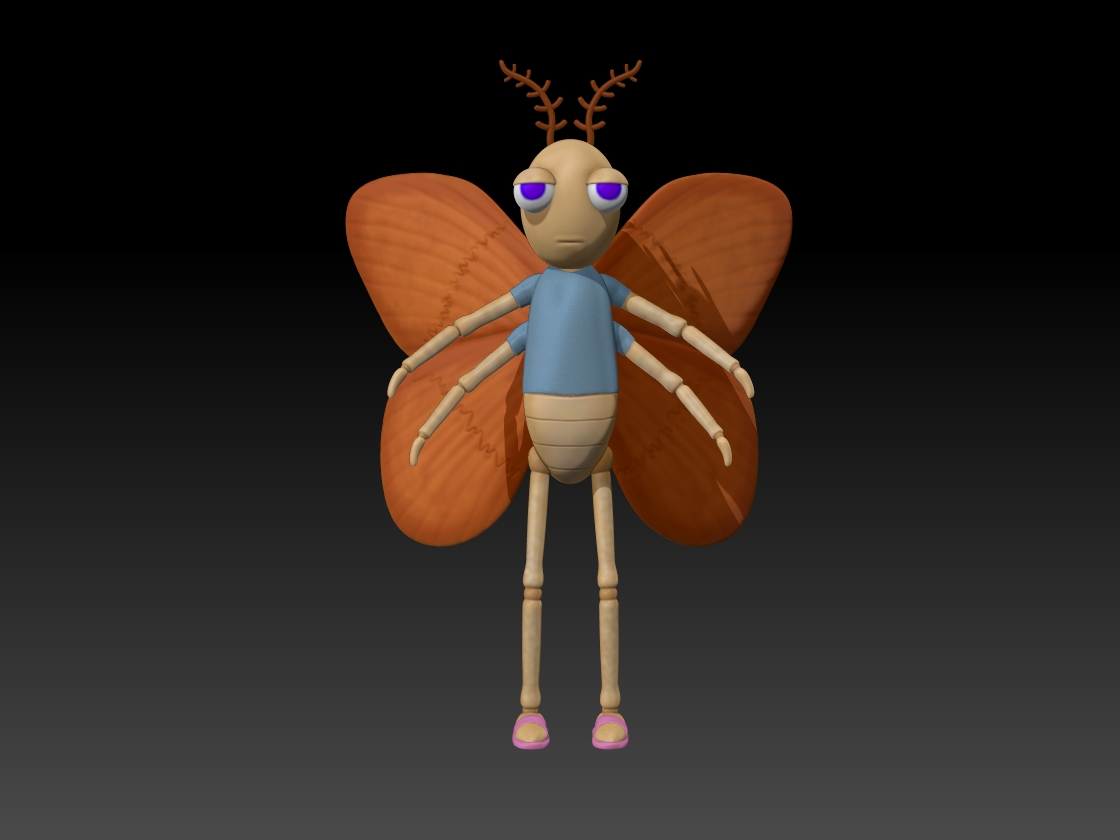
The Art team started this week with the two main player character models completed and optimized, with a base texture. Introducing Giovani the spider and Marcelo the moth!
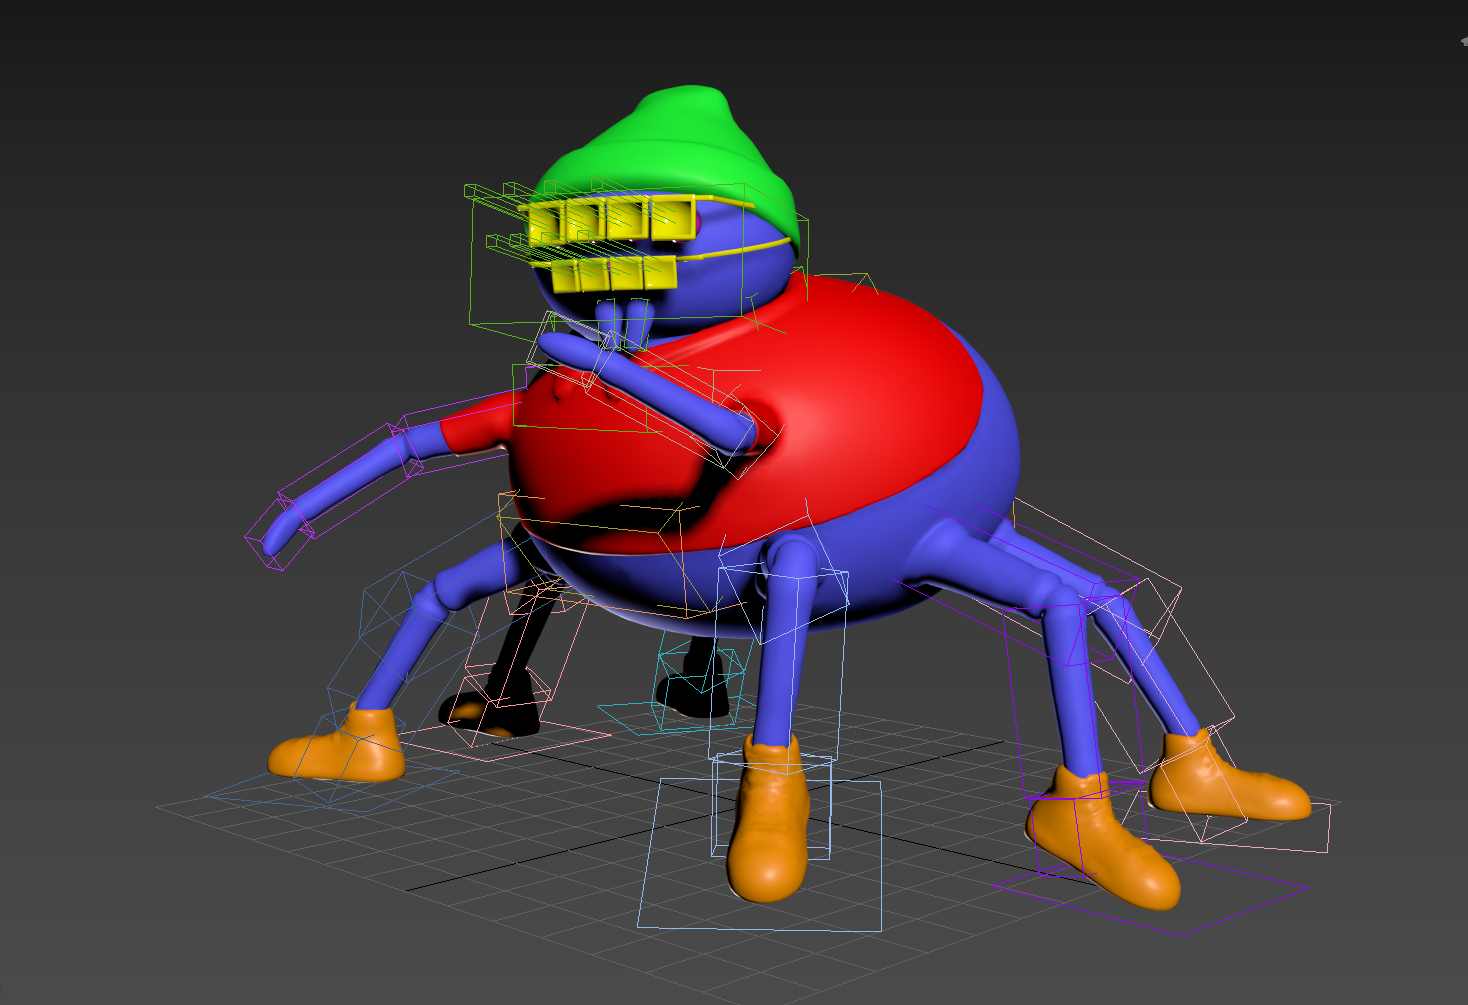
At the beginning of the week the CAT rigs for each character were finalized in 3ds Max and an early walk cycle was started for Giovani. As expected, Giovani's rig was a bit more complicated than Marcelo's, but neither proved to be too finicky.
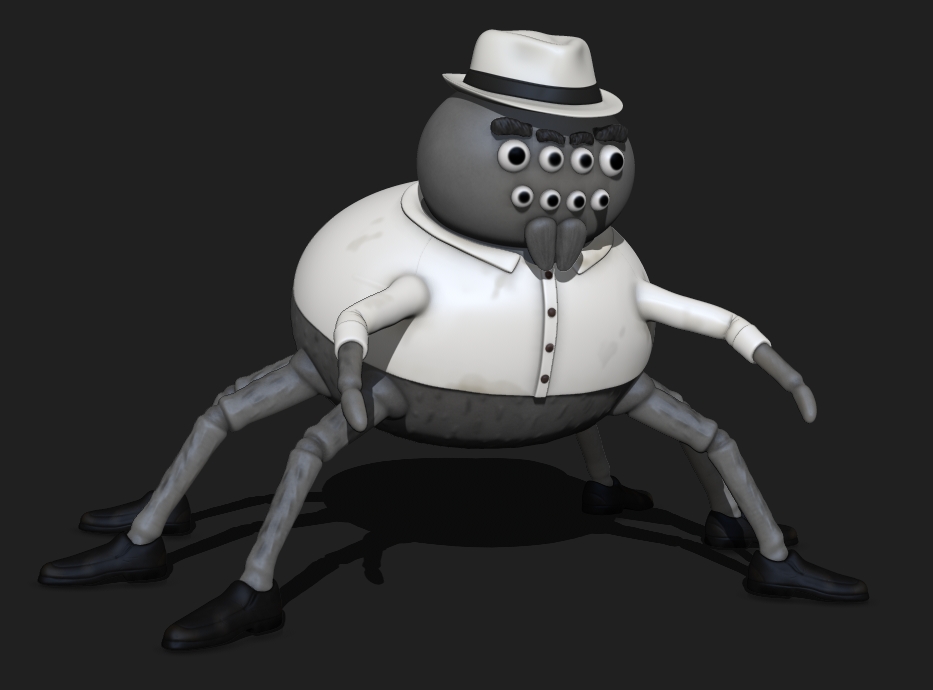
Also this week, the main 'enemy' character, Giuseppe the spider (father of Giovani) was modeled, optimized and given a base texture, as with the previous characters. Giuseppe is yet to be rigged, as the player characters have priority at this time.
Now that the character models have been rigged, we need to get animations implemented for the characters; Audrey will be working on this.
We plan to have some interactable objects in the environment that influence the platforming and level design (such as breaking the window with a baseball, and knocking over a shovel to create a path to a new platform); Milo will be working on this.
We also need UI! In addition to menus, we plan to have a simple dialogue system to tell the story of the game; Jay will be working on this.
We need sound effects and music; Owen will be working on this.
We would like to have some VFX, such as dust particles floating through the air, lights flickering, and glass shattering when hit with the baseball; Audrey will be working on this.
There were some previous features we are considering going back and improving.
We have already improved the spider web aiming system to be able to shoot webs higher.
We are considering making changes to the camera system. The current system can be frustrating for players since when cameras switch it also switches the controls of the players; the solution would be to have the camera smoothly move between points so there wouldn't be an instant jarring switch (though this would require a lot of time to implement). This system also requires a lot of time to set up camera views correctly since you need to block off other cameras with invisible walls.
Currently, the only way to play the game is with a single keyboard. We were considering adding support for 2 separate controllers to be able to be used to control the characters, however we have decided not to do this since the spider web aiming system is tied to mouse position and we would need to spend extra resources to remake that system.
While these systems would be nice, they would require a lot of resources to change and might not be worth focusing on for now when we only have a few weeks left.
With all characters modeled and the two player characters rigged, it's going to be all hands on deck to get the fellas animated. Giovani has already proven to be a bit time-consuming (Spider walk cycles are weird!), but we should be able to make up for that by employing mixamo animations for Marcelo, due to his bipedal anatomy. Along with this, the top priority is finishing any last models (a proper web model primarily). From there, we will begin texturing all of the objects and get baseline UI into the game.
For the playtest build, we added two environmental interactions. The first was a shovel. If the players intersect the hilt of the shovel, a LERP occurs that turns the shovel into a platform to the other side of a gap. To make the shovel into an effective platform, we had to change its hitbox into a collection of cubes.
The other environmental interaction is launching a ball to break the window, which will allow the characters to break out of the basement! To do that, there is a sphere with a small trigger on the back. The sphere has physics disabled until the rope launches while within the trigger, which sets the sphere’s velocity to a specific value, causing it to go up a ramp and impact the window, which deletes the window actor! The visual effects of breaking the window haven’t yet been done, but they’re a next step.
We also added checkpoints! At first, we weren’t sure about having checkpoints since some pieces of inspiration were Bennett Foddy’s games, infamous for their lack thereof. However, we realized a game without checkpoints has to be very sure you can’t possibly get stuck, and the unpredictability of the rope’s skeletal mesh does not allow for that. So, we added them! Players enter an invisible trigger, which sets the “current checkpoint” variable on the checkpoint manager to the checkpoint they just entered. Then, if the player presses enter, they return to whatever that current checkpoint is. It’s a fairly straightforward system, but we ran into a few problems.
The first fun problem was an export issue that made the return the checkpoint button not work at all, but only in the packaged version! After a lot of re-exports, the answer seemed to be that calling the “Get Actor of Class” function at the “Begin Play” event works in the editor, but it doesn’t work in packaged projects! Once we found that out, it was easy to fix.
The other thing we want checkpoints to do is “fix” the rope whenever players move back to a checkpoint. If the rope stretches too hard, it can just completely break and leave the level entirely. We’ve tried to minimize that possibility, but especially on lower-end machines it seems to be an inherent problem with using a skeletal mesh with physics constraints. So we’d like to have a sort of “reset” button to bring the rope back when you go to a checkpoint. This would also prevent the current issue of the rope sometimes stretching too hard upon returning to a checkpoint. Unfortunately, we haven’t gotten this working yet, because there’s no way function in Unreal to set the location of an individual bone in a skeletal mesh physics asset! The poseable mesh component seems to offer a solution, but it is incompatible with physics. We did, however, implement functions to remove and add the constraints. They worked, but the issue is that at the moment the constraints are added, the location of the bones needs to be correct. A potential work-around we looked into is moving the characters themselves to be at the bone locations rather than moving the bones. This worked! However, it still doesn’t “fix” a rope that broke in some other way throughout gameplay.
Jay hasn't filled out this section yet, but we'll update as soon as he does!
We currently have a partially-functional state machine for Marcelo and Giovani’s animations, but it has not been fully implemented. Currently, both characters have functional walking animations, and Marcelo has a running animation. In order to smoothly blend idle animations (Marcelo's is complete, but Giovani’s is not. Neither have been implemented), walking animations, and running animations, we’re using Blend Spaces. Based on the character’s speed (not velocity) the blend “amount” changes.
The parts that are unfinished are all parts of the Animation Blueprints created for both characters. Each blueprint contains a state machine, and due to the lack of a proper grounding check (for both characters; Giovani has one, but Marcelo does not; in trying to have both characters share code, things have gotten complicated), the jump rules used for changing states don’t currently work. The way animation blueprints connect to our player characters makes information sharing difficult, which is the source of most of the problems. Once we find a working solution, the implemented player animations will be complete.
The sounds I added into the build were WebStuck (getting stuck in a web), WebShoot (the spider shooting a web), Flap (Marcelo flying), and I added some level music that plays at the start of the level. I added these in by editing the blueprint relative to the event and used the play sound node.
After playtesting we had 10 responses to our form. We got a lot of positive feedback! Our goal with the main feel of the game was achieved and people really enjoyed playing it. The main complaint we got was about the camera system, and the objective of the game to not be clear. We plan to fix this in the coming week.
The main focus for the art team this week was animations. Due to their unique bug anatomies, we knew the two player characters would have different pipelines for animation. Marcelo’s bipedal structure allowed us to utilize Mixamo animations, while Giovani needed to be done by hand.
Starting with Marcelo, we were able to import the custom CAT rig from 3ds Max into Mixamo and download a handful of basic movement animations. Though Marcelo is bipedal, he still has six buggy limbs, which meant that each mixamo animation needed to be cleaned up to accommodate his extra set of arms.
For obvious reasons, the Mixamo route wasn’t going to work for Giovani. Instead, we took the usual route of animating movement cycles in 3ds Max. After a while of watching insect walk reference videos (gross) and a few attempts, we got to a finished walk cycle. After working with the rig/model for a bit, the next few animations felt a bit more intuitive.
By the time of this blog post, we have walking, running, jumping, take off, landing, flying and idle animations for Marcelo, and walking, jumping and idle animations for Giovani.
Our next steps include:
After receiving feedback on our camera system we decided to change it to a new system that switches based on whether both players are in a box volume. We also set up the capability of spline transitions for the first level, when you enter the next node the camera follows a spline to the next node to make the transition easier for the player.
I have incorporated the required 25 sounds into the game the list of sounds is below:
We brought our game to showfest, and there we noticed a lot of checkpoint issues, much more than we noticed in our in-class playtesting. It was fairly frequent that returning to a checkpoint would break a rope or a character entirely due to stretching it too far.
We tried many approaches to fix this. One was simply moving Giovani to wherever the end of the skeletal mesh ended up after moving Marcelo. This worked well enough, except if Marcelo was far above Giovani when moving back to the checkpoint, Giovani would spawn in the floor. We made a very complex system to try to keep the characters' relative locations before the move as similar as possible to their relative locations after the move, but ultimately nothing we did created a reliable enough checkpoint system. Either the character positions would be unreliable and could end up out of bounds, or the rope could break upon returning to a checkpoint (or sometimes both!).
As we mentioned last week, we also wanted to mitigate the issue of the rope breaking by reinstating it upon revisiting the checkpoints. To solve both of the above problems, we made an entirely new checkpoint system.
Under this system, the entire level is reloaded upon moving to a checkpoint, and the players' positions are updated before the rope has a chance to move. This came with the added benefit of reinstating the rope automatically, but it meant we needed to reinstate the interactables and the dialogue triggers too.
To make this data persist, we added several variables to the Game Instance class, which does not get reloaded when the level loads. Restoring the state of the interactables was fairly straightforward. Restoring the dialogue was a little bit more involved. When the player returns to a checkpoint, the checkpoint system loops through all existing dialogue triggers, checks if they've been activated, then sets up a corresponding array of booleans in the Game Instance. When the scene is restored, the checkpoint system will loop through this array and set the dialogue triggers' variables according to this array.
Every interactable object received some sort of update in the last week. Plus, there’s an entirely new one! First, the shovel was replaced by skis! They had a better hit-box and we had decided to use the shovel elsewhere in the level.
Second, the baseball was given its model. We updated the velocity with which it was launched to be a bit more consistent and also added a new trigger on the window to increase its effective hitbox size, in case the launch physics don’t go exactly according to plan.
A fun error to debug was that the aesthetic glare-looking objects coming out from the window actually had collision, but only with the baseball, making it collide seemingly with nothing. Disabling all collision on the glare objects fixed the launch.
We also added a whole new interactable: the coat hanger! When both players enter the coat hanger’s trigger (and the window is broken), the coat hanger will fall down the clothesline, bringing the characters to the end of the level.
The final addition to all the interactables was making sure that they were reloaded properly when the players returned to a checkpoint. The skis will update their angle accordingly and the ball and window will destroy themselves. The coat hanger, however, stays at the beginning of the clothesline in case the players need to get back to the game’s final platform.
Jay hasn't written this section of the blog yet, but we'll update this as soon as he does!
Audrey did the rest of the VFX, including the following:
All of the particle effects, aside from the flickering lights, were done with Niagara particle systems. The most complex particles are the dust particles, broken glass, and sparks. All of them include some form of randomness so that they aren’t too consistent visually.
We also had to make custom materials for many of the effects. The material for the dust and water is the basic particle material with attributes that allow the scene’s lighting to affect them. The material for the sparks is an edited version of the starter pack’s laser pointer material, which we noticed looked like sparks when going through materials while testing.
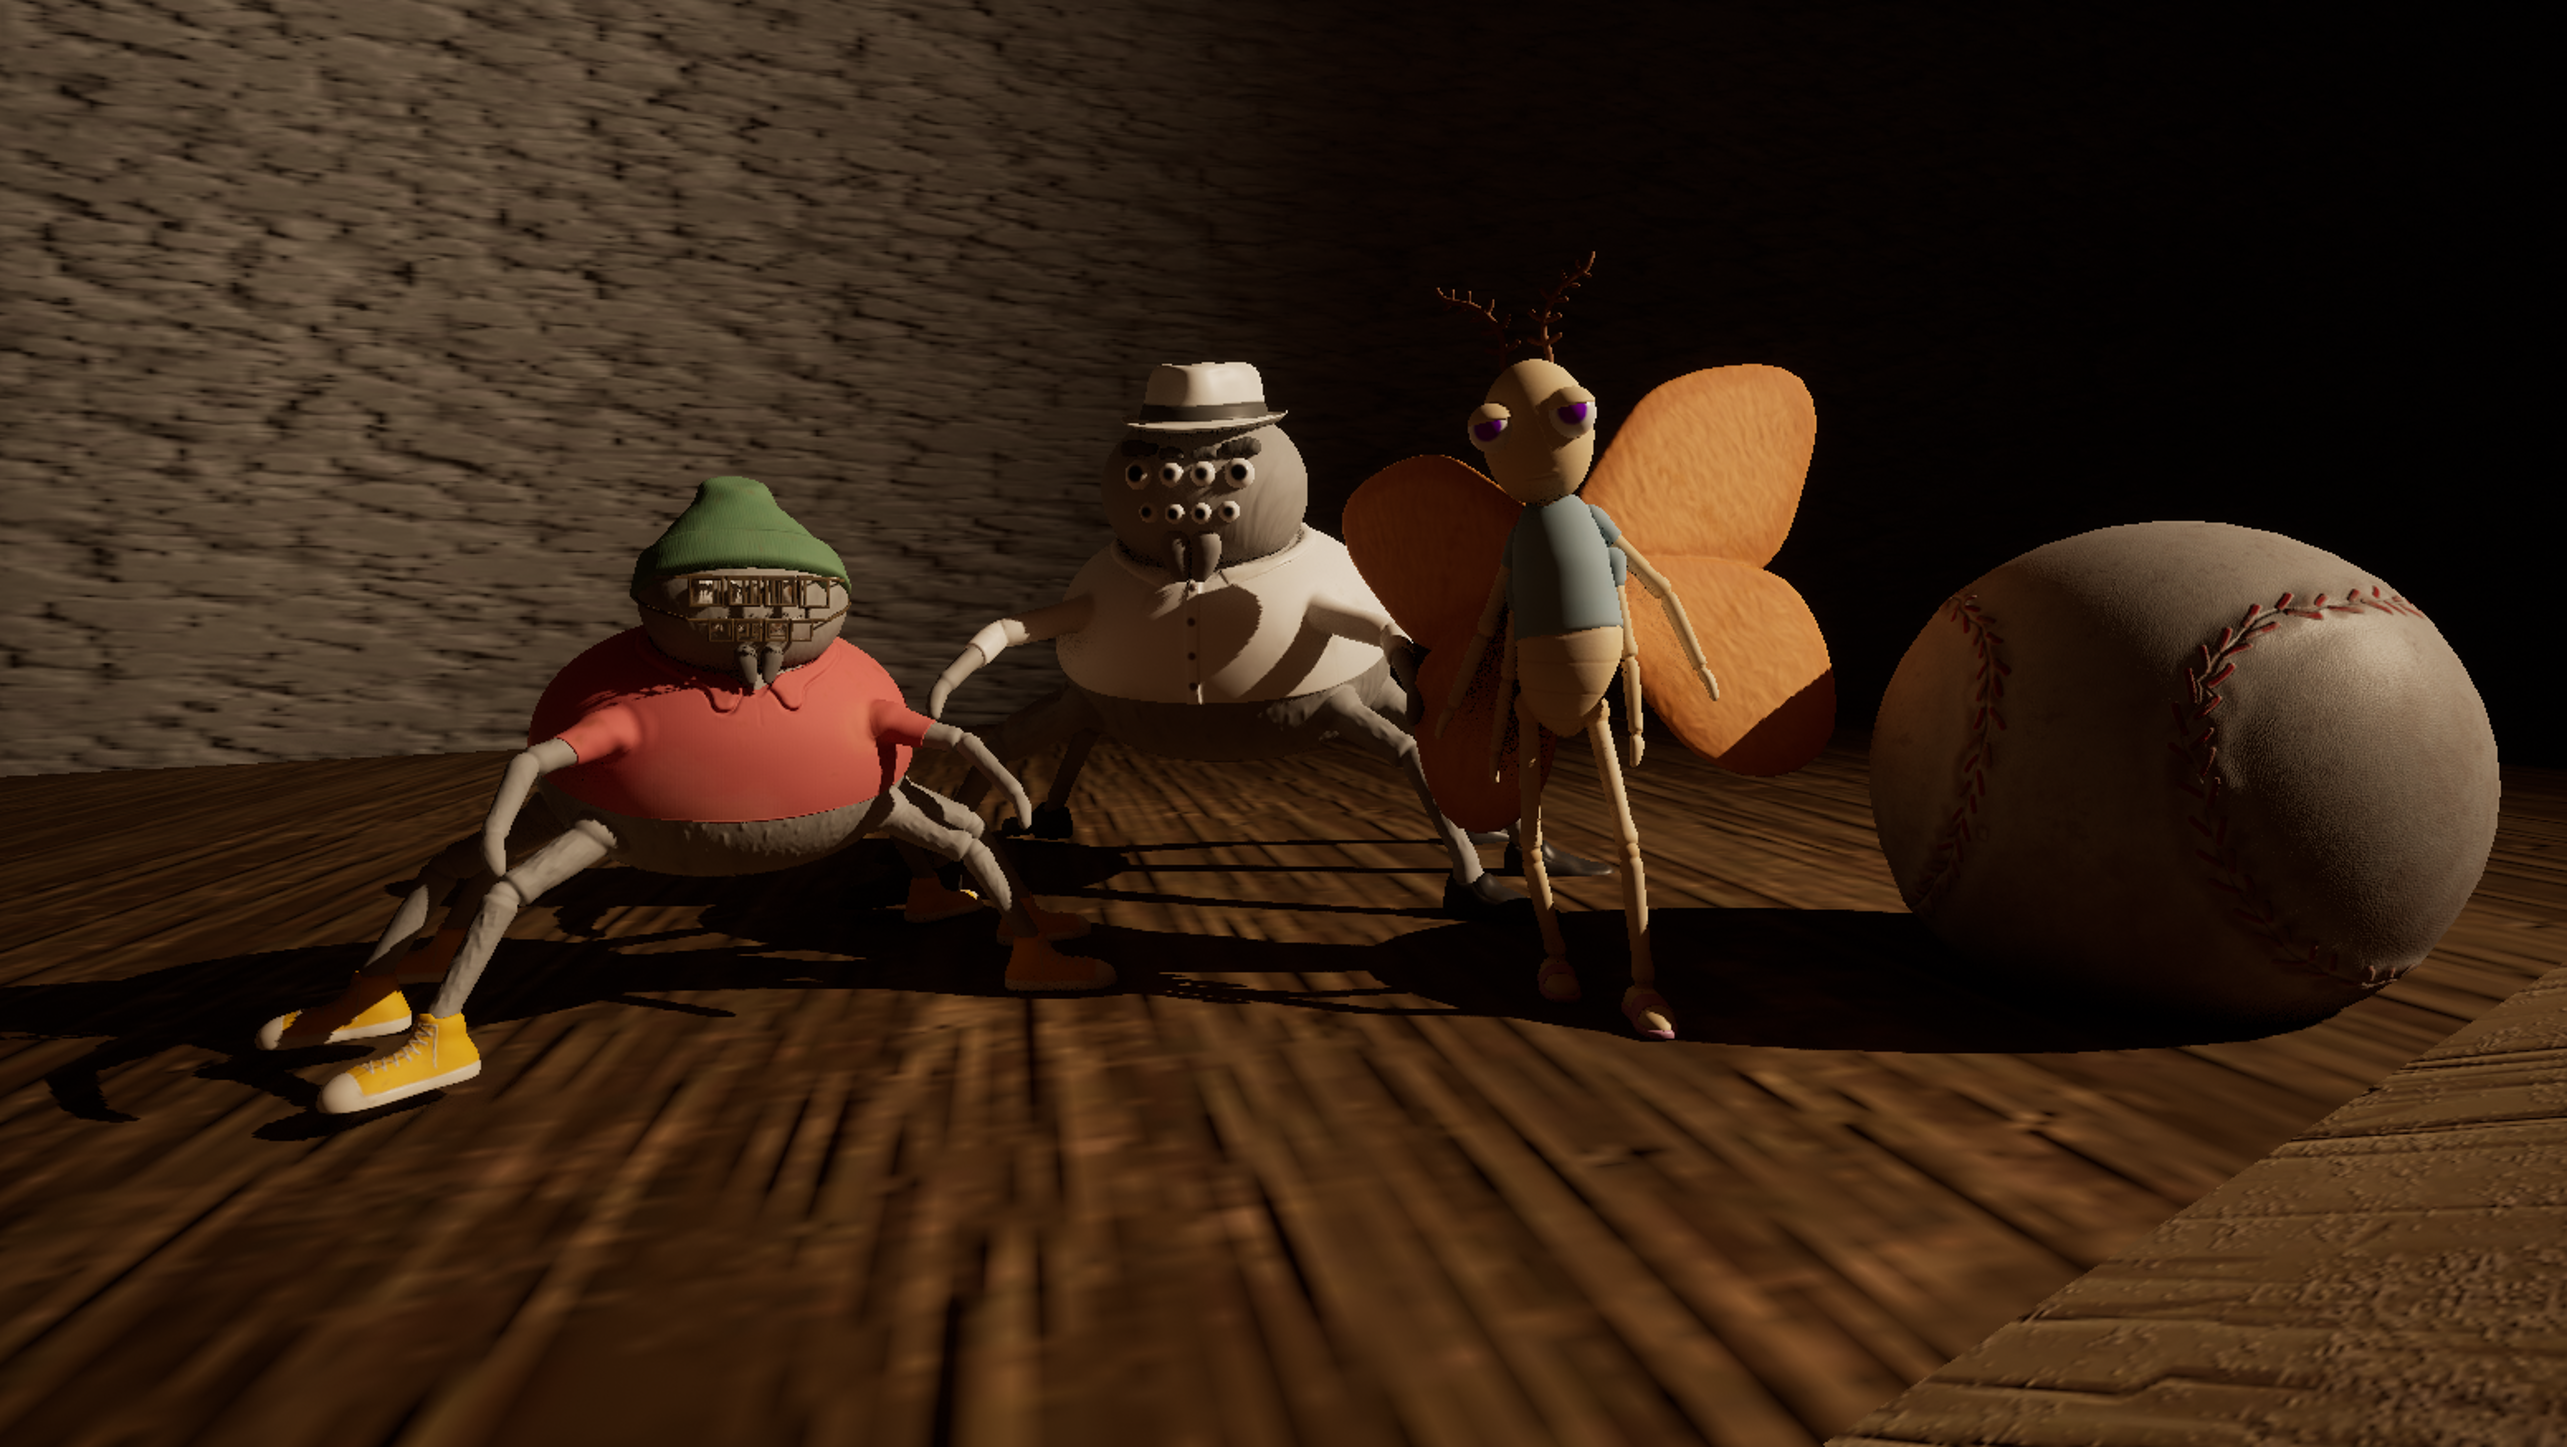
Over the previous weekend the three character models were textured and implemented, as well as a handful of environmental props (such as the walls and larger shelves). Check out the Lads!
Even with a head start of sorts, the art team was all hands on deck for texturing, with the goal of getting all implemented models textured in time for the Showfest build on Friday.